A 5-Step “Quick Start” Guide for Setting up GA4
Google Analytics 4 (GA4), the latest version of Google Analytics, provides rich behavioral data, enhanced privacy, simplified tracking, and important customer insights to help your business thrive.
As Google’s new standard for website and app analytics, many businesses are or should be, eager to migrate to GA4. But, how do you make the transition from Google’s previous Universal Analytics (UA) tool?
Following this quick 5-step guide will help you to easily set up GA4 and begin to take advantage of analytics capabilities that will take you and your business into the future.
1. Log in to Google Analytics.
At analytics.google.com go to Admin. The Admin view allows you to access existing properties associated with your account, and create new ones.
2. Select the Desired Existing Account and Property.
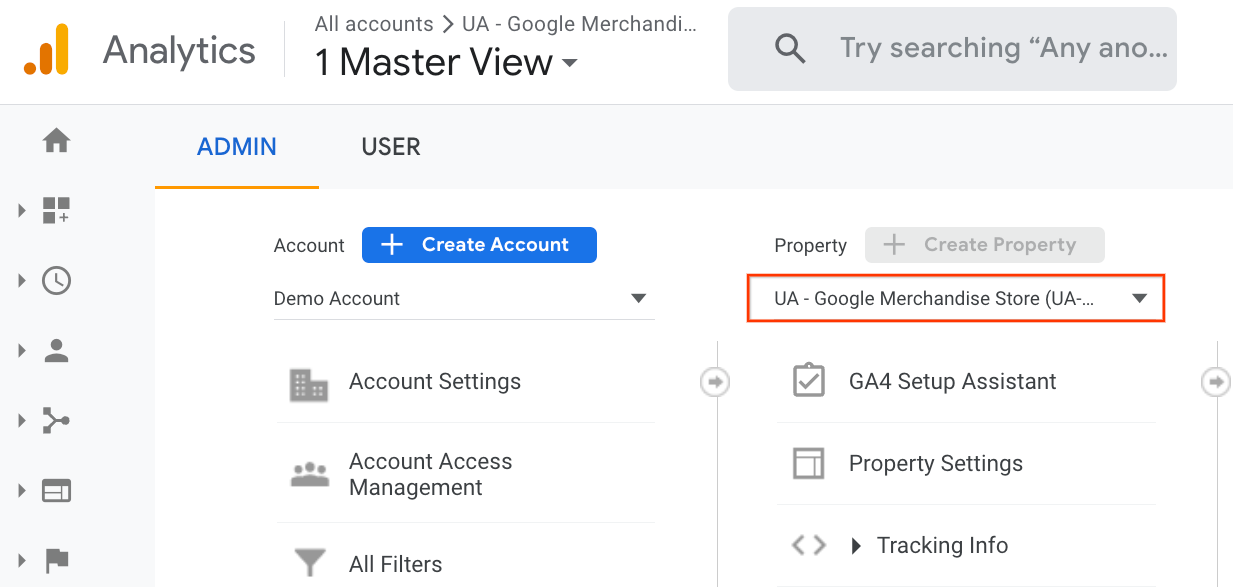
Universal Analytics Admin View
Once you are in the Admin view, select the account containing the website or app data you want to migrate over to GA4. If you have a property called “UA – Lunch Menu,” for example, that you want to upgrade to GA4, click on that property name to open its settings.
3. Select the GA4 Setup Assistant.
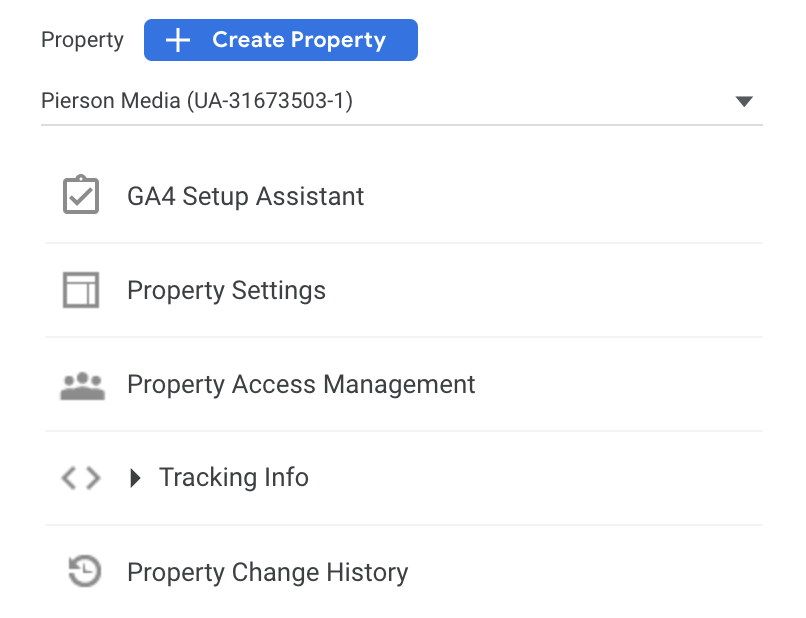
Universal Analytics Property View
While you are within the original UA property, click on GA4 Setup Assistant. This will launch a setup wizard that will allow you to create your new GA4 equivalent of this property, and will check for prerequisites, confirm admin access, and ensure valid UA tracking info is in place to proceed with the migration.
4. Click “Get Started” and “Create Property.”

GA4 Property Setup
Follow the prompts from the setup assistant, and click “Get Started” to reach the final creation screen. Give your new GA4 property a name (matching your UA property name works well), and then configure any advanced settings, like data retention periods.
Click “Create Property” to finish setting up your GA4 equivalent.
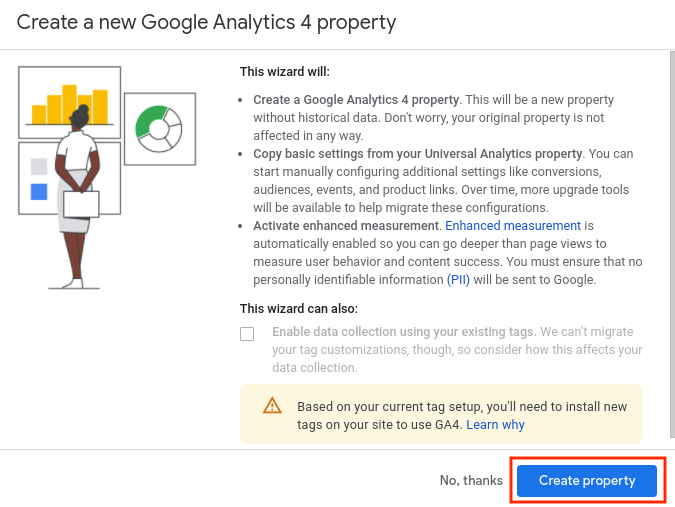
GA4 Setup Assistant
5. Install a new Google tag!
Once you have chosen to create a property, you will want to install a new Google tag that will send data to GA4. You will have up to three options for setting up a new Google tag depending on your site’s configuration:
-
Install Manually – This option will show you a snippet of JavaScript that needs to be cut and pasted into the code on every page of your website. If your CMS does not support Google tags, you’ll need to copy the entire Google tag and paste it into the platform’s custom HTML field.

-
Install with CMS – If you manage your site using certain website builders or Content Management System (CMS) platforms, like WordPress or Wix, you can finish setting up your Google tag without making changes to your code through Plug-In or Connector and simply follow their installation instructions.
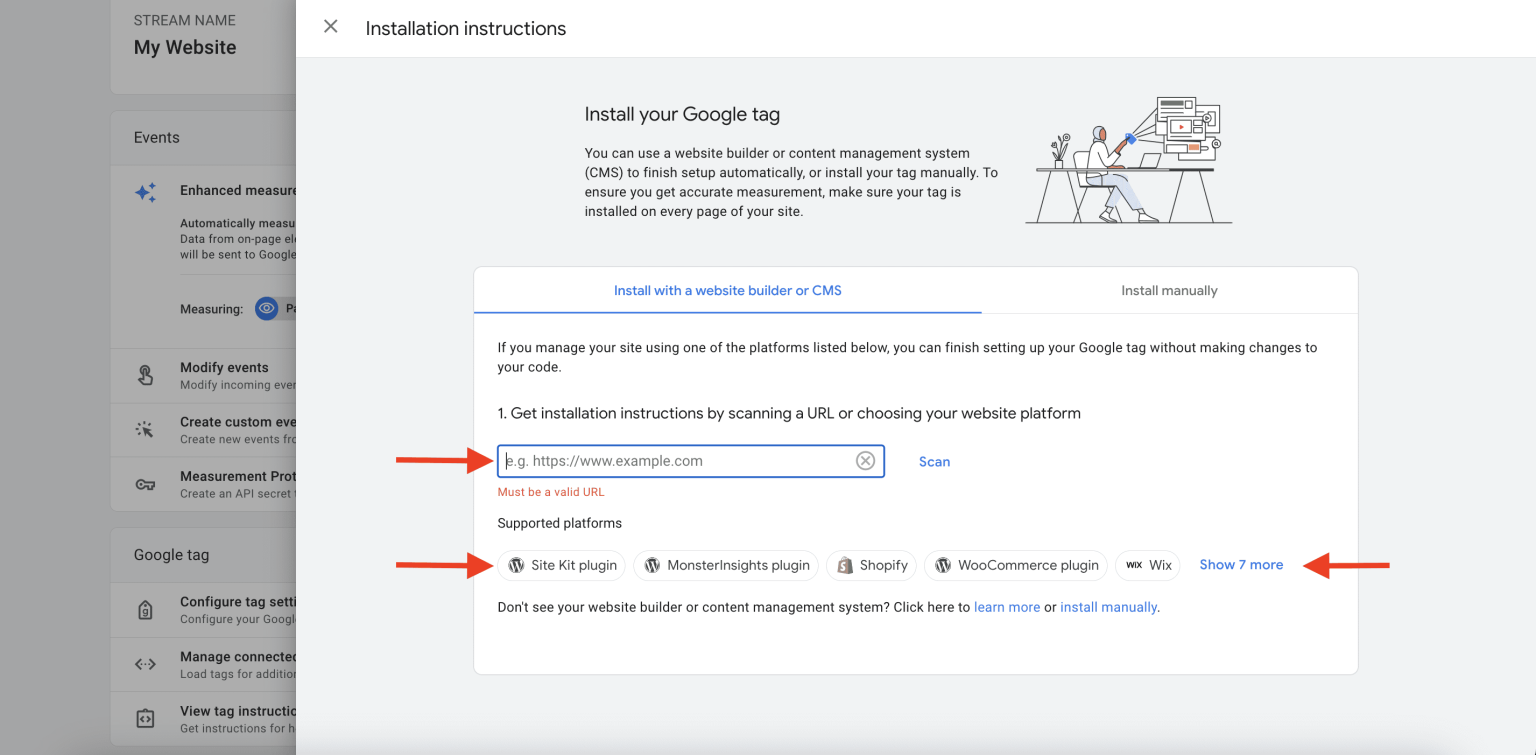
-
Install with Google Tag Manager – Follow the simple instructions in the Tag Manager help center to add tags to your account. You can find the measurement ID you’ll need by going to GA4 > Admin > Data Streams and then selecting the appropriate web data stream.
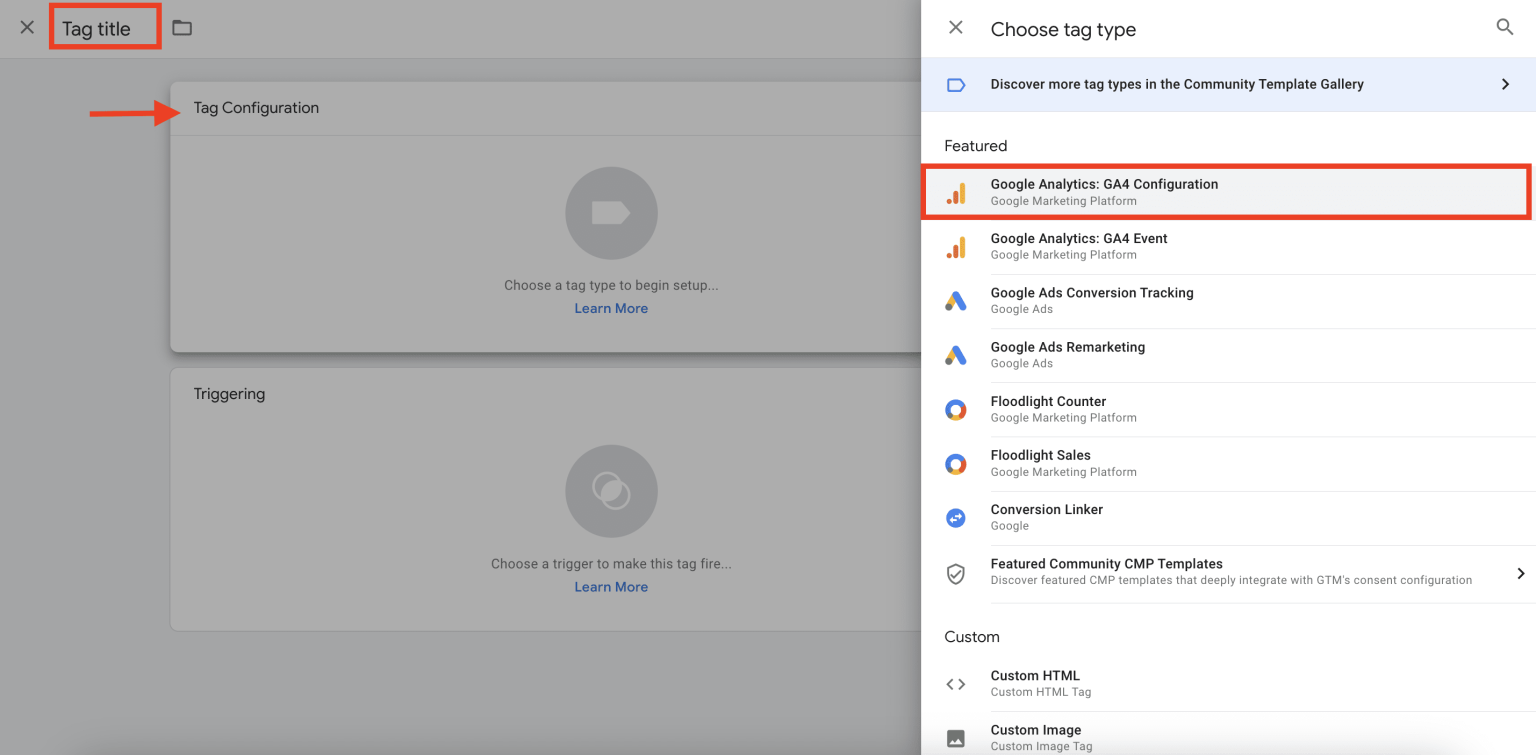
Google Tag Manager

GA4 Website Data Stream & Measurement ID
A note about tracking specific metrics:
Keep in mind that if you want to track conversions, you will need to start by creating an event that defines some segment of data within your property, and then mark it as a conversion, allowing you to zero in on the metrics that are most useful to you. Events track any action triggered by users’ interactions on your website or app, while conversions track specific valuable actions.
For example, if you want to track your customers’ favorite menu items, you could create an event called “favorite_food” and configure it to track data about page views or clicks on menu items to collect and record information about their viewing habits within your menu.

GA4/Property Setting/ Data Display/ Events
If you also want to see what is most ordered, you would want to create another event to track how many items added to a cart became completed orders and mark it as a conversion.
Gathering information like this can help you see where you might want to expand on certain offerings or limit others that are less popular, so completing all of these steps is critical to your success in collecting actionable data.
Soon after your GA4 property is created and pulling in your website or app data it will begin populating with all your site and app analytics. It will take about 30 minutes until you start to see your new data.
If you have never used Google Analytics and are ready to start leveraging the powerful data that Google makes available for free, there are some simple steps to set up GA4 for the first time.
Visit https://analytics.google.com/ and choose the option to “Start Measuring.” You will be prompted to create an account name and configure your data-sharing settings, which will allow you to customize how you share the data collected from websites and apps with Google. From there, you are ready to start creating new properties and putting GA4 to work for you.
Conclusion
With these quick five steps, you can rapidly get started with Google Analytics 4. The increased flexibility, actionable insights, and integrated experience GA4 enables make the migration well worthwhile for most websites and apps and gives you the power to grow your business intentionally and efficiently.
If you need help setting up your business website to take advantage of the benefits of GA4, contact us at https://piersonmedia.com and learn how we can partner to grow your business together.


